
Malden Wood Flooring handles hardwood floor repair in Malden, MA and in surrounding cities including Everett, Melrose, Chelsea, Medford and Somerville. For more than 20 years we have replaced damaged boards, stopped squeaks, patched radiator holes and brought water-stained and pet-damaged floors back into one continuous surface.
A good repair disappears. That means matching the species, grade, width and thickness of the old boards, weaving the new ones in so the joints stagger naturally, and finishing the area so the color blends with the floor around it. A square plug of wood filler or a strip of mismatched boards is exactly the kind of repair we are usually called in to redo.
Most of the floors we fix are older oak and pine in houses built long before modern subfloors. That changes how we work: we set old cut nails before sanding, check how much wood is left on thin boards, and treat any painted edges as a possible lead hazard in homes built before 1978.
Replacing and Weaving In Boards
Cutting Out Damaged Boards
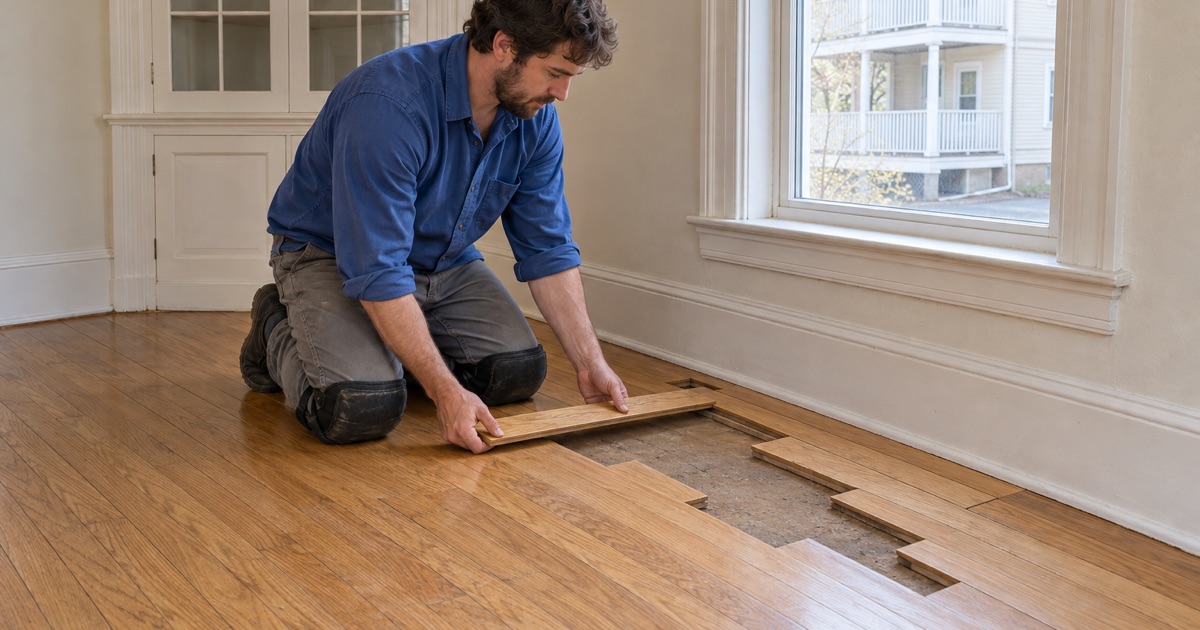
When a board is split, stained through, burned or rotted, we cut it out cleanly without damaging the boards beside it. The tongue and groove on the neighbors is kept intact, and the replacement board is fitted, glued where needed and fastened so it sits flush with the floor around it.
This matters on floors that are already thin. Old boards can crack if pried carelessly, so we cut lengthwise down the center of the damaged board and lift the pieces out rather than levering it against the good ones.
Weave-In Repairs That Hide the Patch
A weave-in repair replaces boards in a staggered pattern that follows the existing layout, instead of cutting a straight line across the floor. When the repair is sanded and finished with the surrounding area, the eye has nowhere to catch. We use the same approach after a wall comes out or where two floors meet at an old doorway.
Matching Old Oak and Pine
Old floors are often red oak, white oak or pine in widths and thicknesses that no longer come standard. We identify the species and cut, look at the grain and grade, and source new or reclaimed stock that matches. Where an exact match is not available, we may borrow boards from a closet and put new stock there instead.
Finish matching is the second half of the job. New wood under a fresh coat looks lighter than oak that has aged under an oil-based finish for decades, so we test stain on the replacement boards before blending the repair into the floor.
Radiator Holes, Squeaks and Loose Boards
Patching After Radiators Come Out
When steam or hot water radiators are removed, they leave pipe holes, cut boards and sometimes a discolored rectangle where the radiator stood. We remove the damaged section and weave matching boards into the existing floor, then sand and finish it with the room rather than filling holes with wood putty that cracks and shows.
We check the subfloor at the same time. Old radiator locations often hide leaks or rot from years of dripping valves, and a patch laid over soft subfloor will not stay flat.
Stopping Squeaks at the Source
Squeaks come from movement between boards, fasteners and subfloor. We locate the joists and refasten loose boards into them, set nails that have backed out, and fill the holes. If the floor below is unfinished, we may work from underneath with shims or screws so the finished surface is untouched.
Cut Nails and Face Nailing
Many older floors were face nailed with square cut nails through the top of the board. Over time those nails work loose and heads rise above the surface. We set them below the surface before sanding, and replace any that no longer hold, because a proud nail head tears sanding paper and gouges the wood around it.
Stains, Gaps and Pests
Pet Urine and Water Stains
Dark gray or black stains usually mean moisture has reacted with the tannins in oak. If the stain is shallow, sanding may remove it. When it has soaked through the board, the board is replaced, and with pet urine we check the subfloor too, since odor trapped underneath comes back with warm, humid weather.
Plant pots, a leaking refrigerator line and a dog bowl by the back door leave the same kind of mark in different places. Where the stain has an outline, it usually tells us where the water sat, which helps decide how many boards around it need to come up and how many can stay.
Winter Gaps and Board Gapping
In heating season, solid wood shrinks and gaps open between boards. Those winter gaps close again as humidity returns and should not be filled with rigid filler that will crack out. Gaps that stay open year-round or appear in one area point to a moisture or subfloor problem that we diagnose before recommending any repair.
Powderpost Beetles and Carpenter Ants
Small round exit holes with fine powder around them suggest powderpost beetles, while carpenter ants leave coarser shavings and galleries in wet wood. We check whether activity is current and how far damage goes. Active pests need treatment first; then we replace damaged boards and any subfloor that has been weakened.
We say plainly when a pest professional has to come before us. Carpenter ants in particular follow moisture, so finding them under a floor often leads back to the same leak that is staining the boards, and both problems get solved in the right order.
Cupping, Crowning and Buckling
Reading Cupped and Crowned Boards
Cupped boards have raised edges because the underside took on more moisture than the top. Crowned boards are higher in the middle, often because a cupped floor was sanded flat before it dried. We take moisture readings across the area to find the source before recommending any repair.
When Boards Have Buckled
Buckling is when boards lift off the subfloor entirely, usually after a major leak or flood. Those boards generally need to come out. We dry the subfloor, confirm the readings, and then replace the buckled section with matching boards woven into the floor that survived.
Fixing the Cause, Not Just the Boards
No repair lasts if the moisture problem remains. A dripping radiator valve, a leak from the unit upstairs, a missing vapor retarder over a damp basement or a failed sump pump all need to be dealt with first. We point out what we find and time the board work for after the source is fixed.
Our Step-by-Step Hardwood Floor Repair Process
Step 1: Diagnose and Measure
We inspect the damage, take moisture readings, check the subfloor and identify the species, width and thickness of the boards.
Step 2: Source Matching Material
We find matching new or reclaimed boards, or plan to borrow from a closet if the original is no longer made.
Step 3: Remove and Replace
Damaged boards come out, the subfloor is repaired, and new boards are woven in and fastened flush.
Step 4: Blend the Finish
The repair is sanded and finished with the surrounding area, with stain tested first so the color blends into the floor.
- 20+ Years on Wood Floors
- Free Written Estimates
- Stairs Priced Per Tread