
Malden Wood Flooring puts in new hardwood floors across Malden, MA, and our hardwood floor installation crews also work in surrounding cities including Everett, Melrose, Chelsea, Medford and Somerville. After more than 20 years of laying solid and engineered boards, we treat installation as mostly about what happens before the first board goes down: the subfloor, the moisture, the layout and the transitions.
The houses we install in are rarely simple. Many are prewar two-families with plank subfloors, rooms that have been opened up, old oak in one room and carpet in the next, and doorways that were never meant for a thicker floor. Newer condos bring association rules, concrete slabs and sound requirements. A floor that ignores any of that squeaks, gaps or cups within a year.
We install site-finished and prefinished solid hardwood, engineered wood in basements and over radiant heat, and patterned floors like herringbone. Every quote lists the species, grade, fastening method, subfloor work and trim separately.
Choosing the Right Wood for the Room
Solid Versus Engineered Hardwood
Solid hardwood is one piece of wood from top to bottom, usually three-quarters of an inch thick, and can be sanded and refinished many times over its life. It belongs above grade, nailed to a wood subfloor. Engineered hardwood has a real wood wear layer bonded to a plywood or composite core, which makes it more stable where moisture and temperature swing.
We recommend engineered boards for basements, concrete slabs and radiant heat, and solid boards for most first and second floors in older houses. Engineered products with composite cores are covered by federal formaldehyde emission rules under TSCA Title VI, so we check for the compliance label on anything we install.
Species, Grade and Cut
Red oak and white oak are still the standards for good reason: they take stain well, hide wear, and are easy to match to older floors. Maple is harder but can blotch under stain. Rift and quartersawn oak shows a straighter grain and moves less, while select grade has fewer knots and less color variation than common grades.
The Janka hardness rating helps compare how well each species resists dents, but it is only one factor. Grade, cut, board width and finish all change how a floor looks and wears, so we bring samples of each option into your light before you order.
Prefinished or Site-Finished
Prefinished boards arrive already stained and coated, so the room can be used soon after installation and there is no sanding dust. Site-finished boards are installed raw, then sanded flat and coated in place. That gives a smoother surface, any custom stain, and an easier match to an existing floor next door.
Subfloors, Moisture and Acclimation
Checking and Correcting the Subfloor
Old plank subfloors, sagging joists and patched areas are common under older floors. We check for loose boards, squeaks, rot and dips, refasten or add plywood where needed, and flatten high and low spots. A new floor laid over a bad subfloor telegraphs every flaw and squeaks where the old one did.
Moisture Readings Before Installation
Wood moves as it gains and loses moisture. We take readings of the subfloor and the new flooring with a moisture meter and install only when they fall within the manufacturer’s range. A floor installed wet will shrink and gap in the first heating season; one installed too dry into a damp house can cup.
New construction and gut renovations need extra patience because plaster, drywall mud and paint all add moisture. We wait until the wet trades are done and the heat or air is running before bringing the wood into the house to acclimate.
Basements, Slabs and Radiant Heat
Below grade, solid hardwood is the wrong choice, but engineered flooring can work over a dry slab with a vapor retarder and the right underlayment. Over radiant heat, we follow the manufacturer’s rules on approved products and floor temperature. Where a basement has flooded before or a sump pump runs often, we say plainly when wood is a poor bet.
Installation Methods and Fasteners
Nail-Down With Cleats or Staples
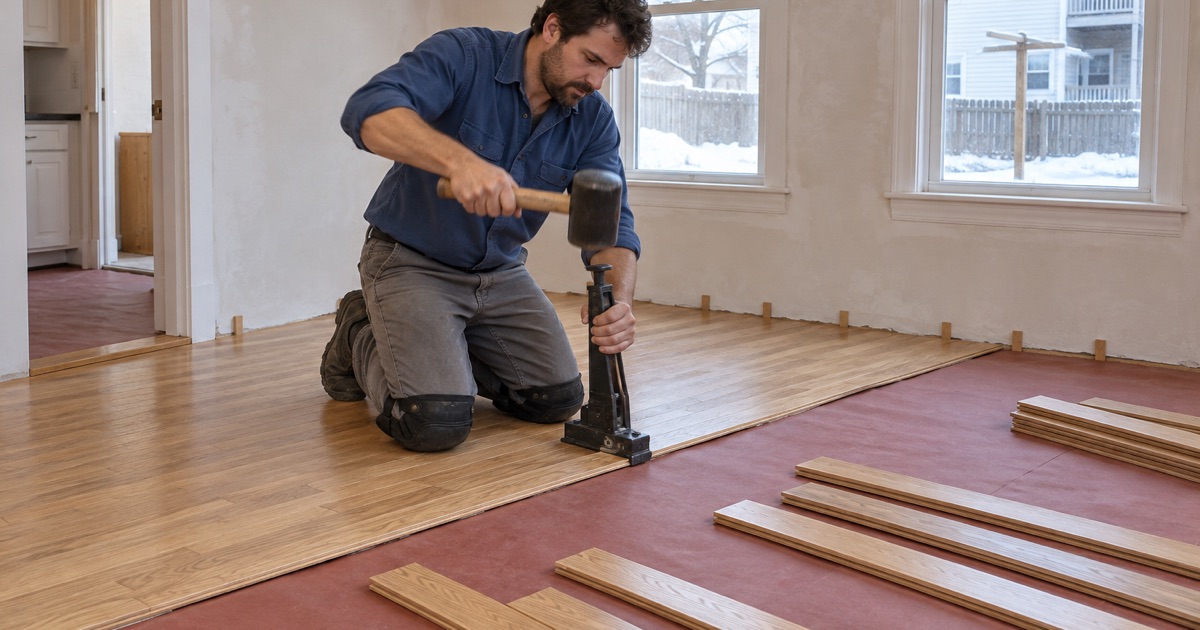
Solid hardwood is blind nailed through the tongue into the subfloor with flooring cleats or staples. Cleats hold the board while allowing a little seasonal movement, and staples grip tighter. We use what the flooring manufacturer specifies and set the nailer pressure so tongues do not split, because a split tongue loosens and squeaks.
Glue-Down and Floating Engineered Floors
Engineered boards over concrete are often glued with a urethane adhesive that also acts as a moisture barrier, when the product allows it. Floating floors click together over an underlayment and are not fastened down at all. Each method has its own flatness and moisture limits, and we choose based on the slab, the product and the room.
Expansion Gaps and Layout
Every wood floor needs an expansion gap at the walls to allow seasonal movement, hidden later by baseboard or quarter round. Layout matters too: we start from a straight reference line, stagger end joints, and plan so narrow rips do not land at a doorway. Herringbone and other patterns are laid out from a center line.
Transitions and Trim in Older Houses
Meeting Existing Floors
When new hardwood meets an existing wood floor, we can weave the new boards into the old at the doorway rather than laying a threshold, then sand and finish both together if the floors are site-finished. Where heights differ, a reducer or threshold makes a safe, even transition.
Stairs, Doors and Baseboards
A new floor raises the height at the top and bottom of stairs, so we plan the stair nosing and the first tread to keep rise heights consistent and safe. Door casings are undercut, doors may need trimming, and baseboard is reset or quarter round added along the walls.
Condo Units and Underlayment
In a condo, hardwood over another unit can carry sound. Many associations require approval and a specific acoustic underlayment, set out in their own documents under Massachusetts condominium law, M.G.L. c.183A. We ask for those rules first, then build the install around them.
Our Step-by-Step Hardwood Floor Installation Process
Step 1: Measure, Inspect and Quote
We measure each room, check the subfloor and moisture, and note stairs, doorways and trim. You get a written quote with materials, subfloor work and trim listed separately.
Step 2: Deliver and Acclimate
The flooring arrives and sits in the house until the moisture readings match the subfloor, while we remove the old floor covering and prepare the base.
Step 3: Prepare the Subfloor
We refasten, patch and flatten the subfloor, add a vapor retarder or underlayment where the product calls for it, and snap reference lines for the layout.
Step 4: Install the Boards
Boards are laid, fastened and staggered to the layout, with expansion gaps at the walls and transitions fitted at each doorway and stair.
Step 5: Finish, Trim and Walkthrough
Site-finished floors are sanded and coated; prefinished floors are cleaned. Trim is installed, and we walk the floor with you and leave care instructions.
- 20+ Years on Wood Floors
- Free Written Estimates
- Stairs Priced Per Tread